
Peg Doll Nativity Set – How to Paint a Mini Heirloom Yourself
Learn to paint this sweet mini peg doll Nativity set yourself! For us crafty types, Christmas starts early, especially if we want to craft some Christmas gifts. My mini Nativity set is the perfect project for a Christmassy “crafternoon”. In just a few hours, you’ll have the sweetest little heirloom Nativity to gift or to keep for yourself.
Ugly or Breakable?
I’ve always loved Nativity sets. When I was a kid, I remember the excitement of getting the boxes of Christmas decorations out of the attic and rediscovering all our treasured “heirlooms”.
We had this old common Nativity set that was probably made in the fifties or sixties. It was not cute. The stable was cheaply made and the figures were plastic and were badly painted. We didn’t care. My sisters and I loved to set up and play with that Nativity set, over and over again throughout the season leading up to Christmas. Our favorite part about that set was that Mary and Joseph’s cloaks could come off and we could switch their heads! Our Mom was pretty chill about us playing with it because we couldn’t really hurt it at all.
Years later, when we kids were almost grown, our parents got a much nicer glass set, but they never got rid of the old one, and now the grandkids love to switch the heads. That ugly old Nativity set became an accidental heirloom, and my poor Mom has to live with it forever!
When I got married, we were gifted a beautiful large ceramic Nativity set. I think we only set it up for a couple of Christmases, and then came babies. I carefully packed it away and kept an eye out for a beautiful, yet kid friendly Nativity set that I could proudly display in our home, but that I wouldn’t worry about the kids breaking. A few ugly plastic ones came and went, but none of them ever screamed “heirloom”.
Have Kids and Nice Things Too
I started painting peg dolls when my kids were still little. One of the first sets I wanted to create was a Nativity set. I was so excited to design a beautiful, heirloom quality, yet unbreakable set that my kids could play with and that I wouldn’t want to hide away.
The first Nativity set I designed was large and included all the figures of the Christmas story. It was colorful and cute. Eventually I found myself wanting something that didn’t look so bright and kid- ish. I adjusted and tweaked the design and now it’s painted with a more subdued neutral pallet. It is classic and timeless, fits well in any home, and kids still love it. However, it is expensive for me to make the large full sized Nativity sets since it takes so many hours to paint. I needed something that would be just as beautiful, but more affordable for families and collectors.
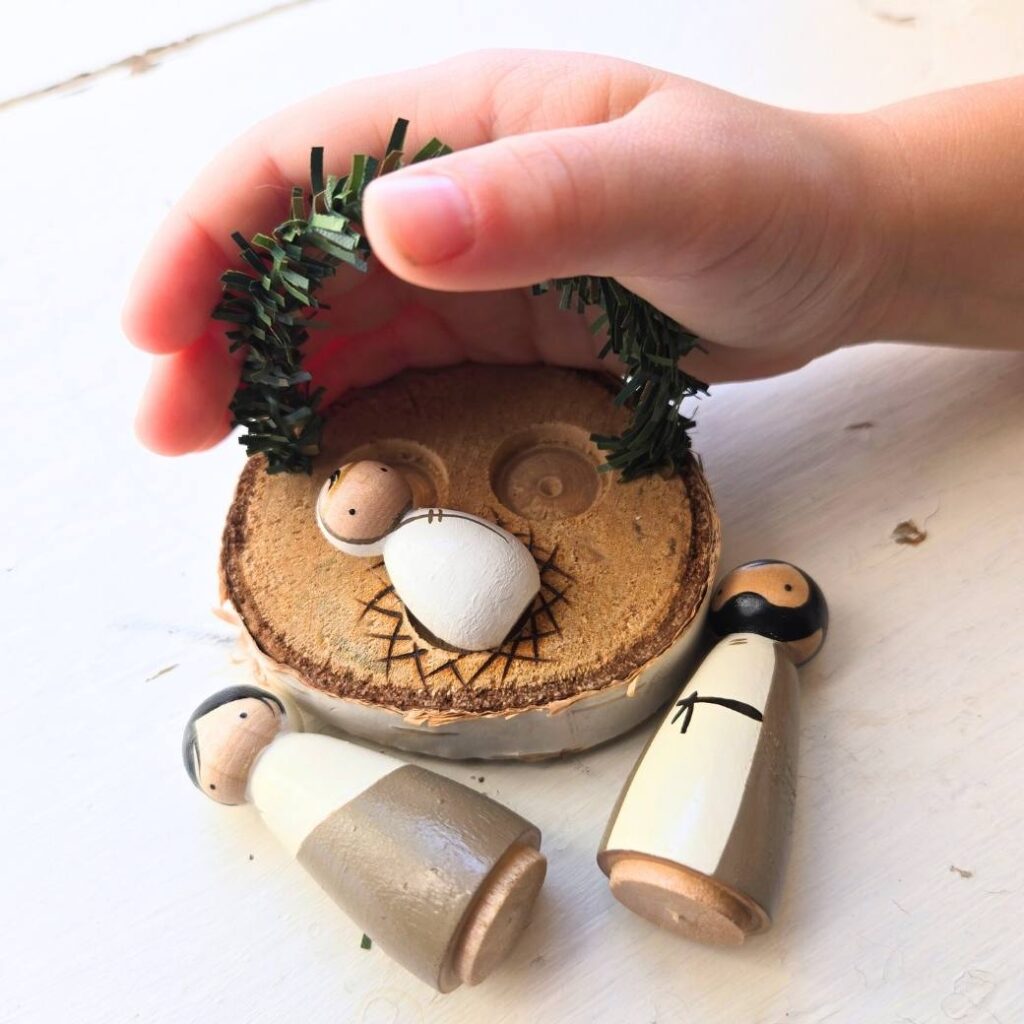
I then designed this mini Nativity set and they quickly became a best seller at my Christmas Markets. They have been a very popular alternative to my large full size Nativity Set ever since. Because this is a mini nativity, it works as either a play set for children or as décor for Nativity collectors.
The Design
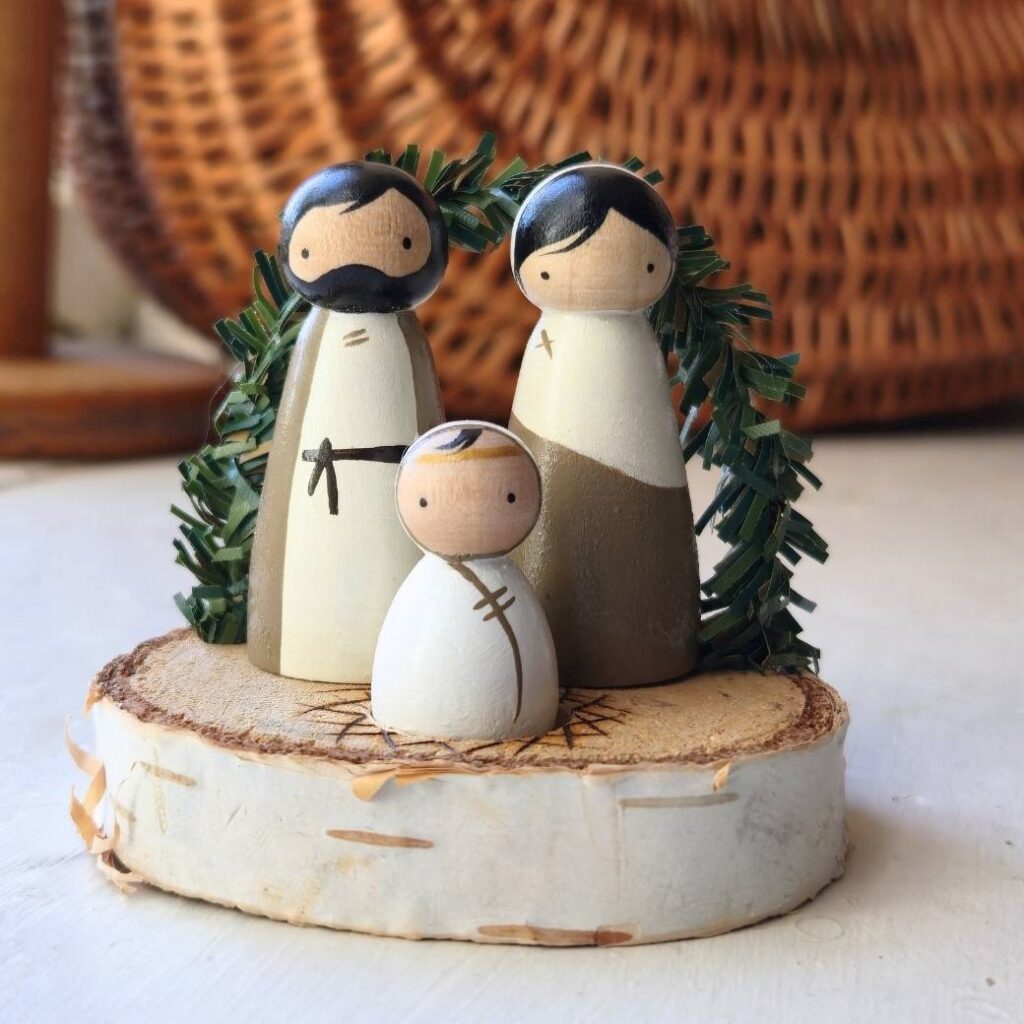
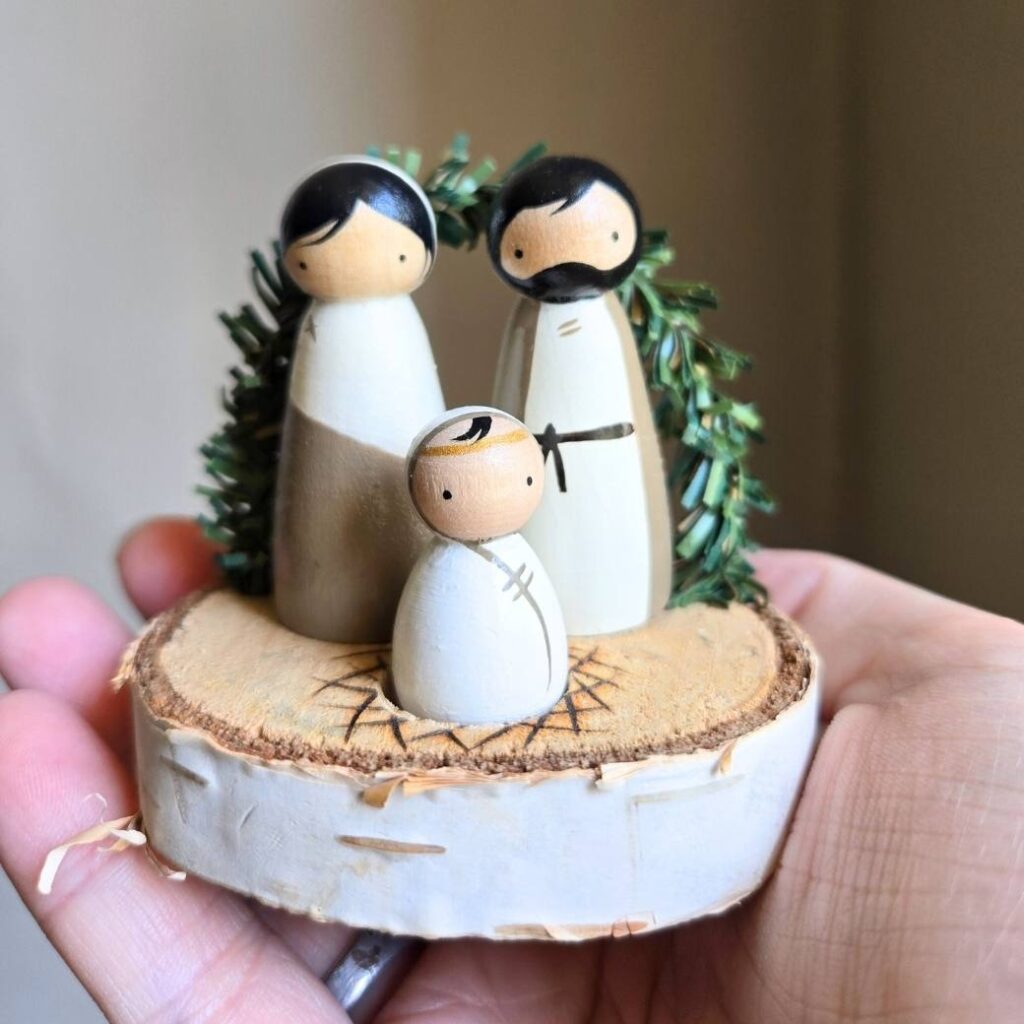
The Mini Nativity is simple in its design as I planned them to be a quick, but timeless collectors set for my Christmas markets. They have very few details, but just enough to make them special. With smaller peg dolls, I find that “less is more” when it comes to details.
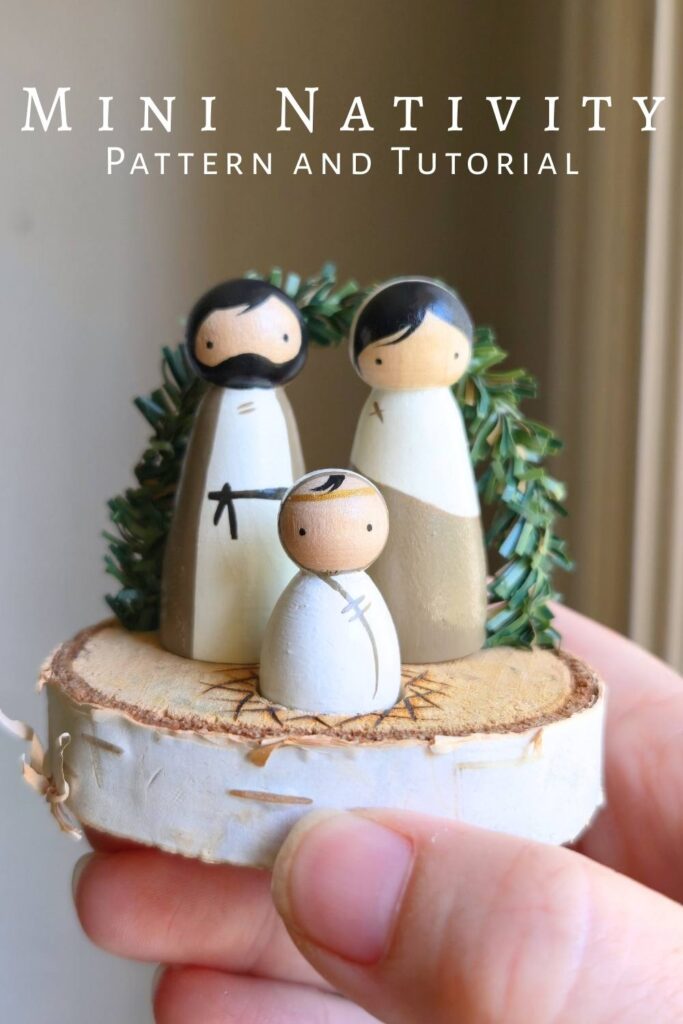
Joseph
Joseph is simply clothed with an under robe of off white homespun. He has a cloak of brown cloth, and a leather belt. He is a young man with a full black beard.
Mary
Mary is wearing a dress of brown and a head scarf of the same white homespun as Joseph’s robe. I imagine that Mary would have woven the cloth and sewn their clothing herself, so naturally, they match. She has long black hair, but only her bangs are visible, peeking out from under her scarf.
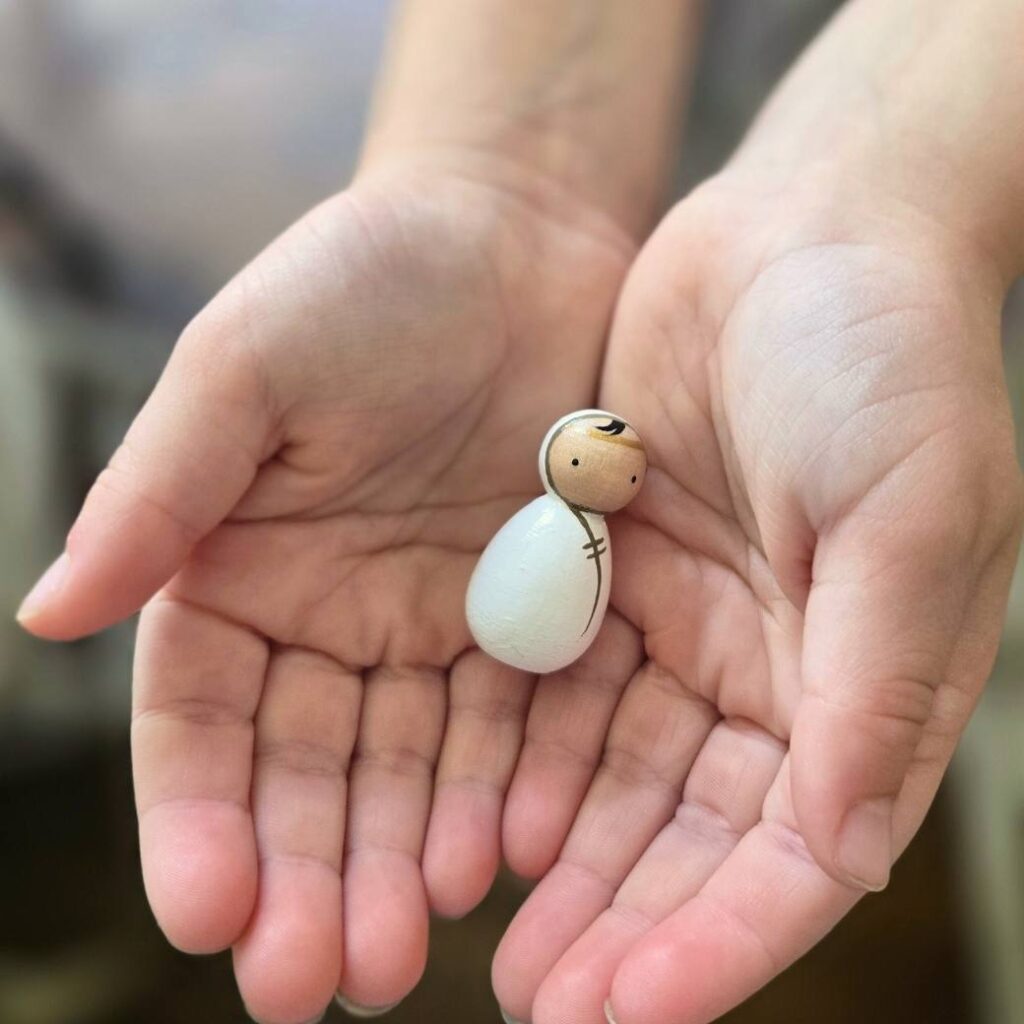
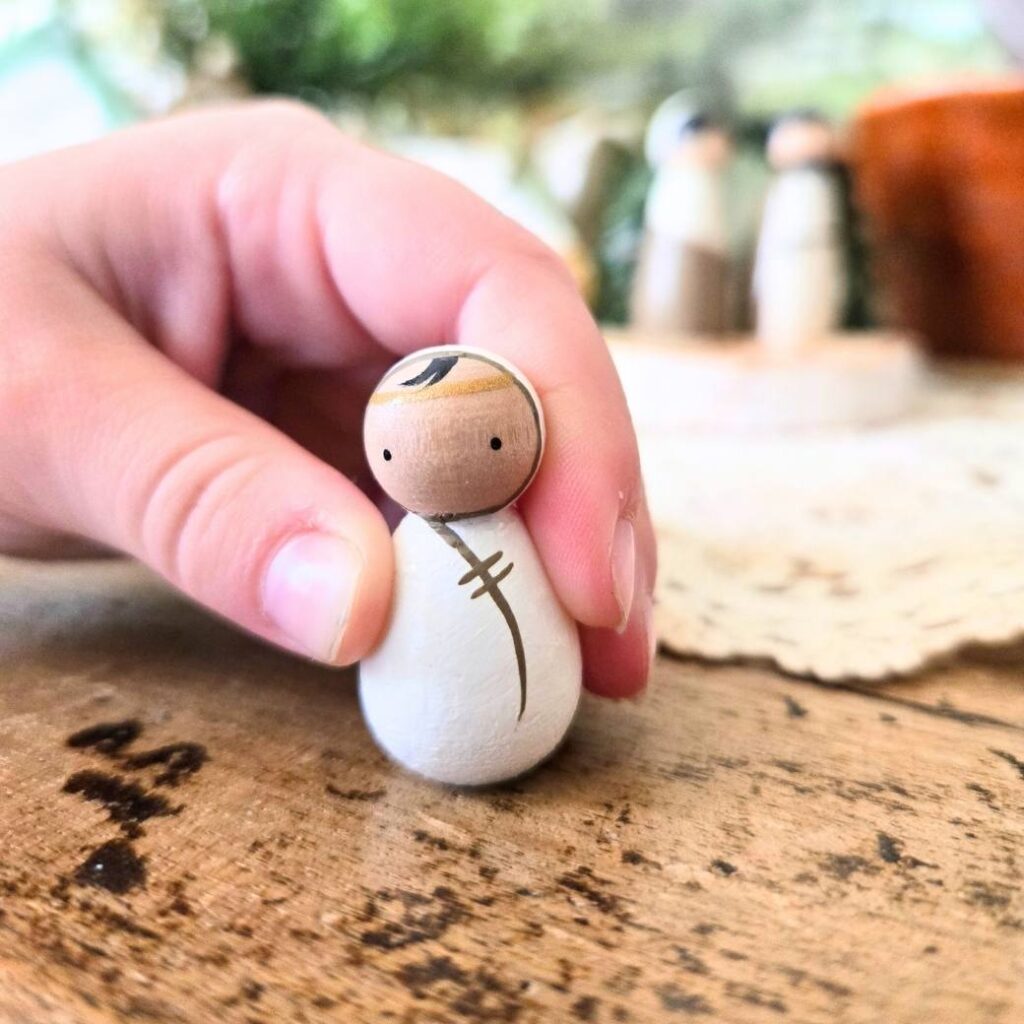
Baby Jesus
Baby Jesus is wrapped in swaddling clothes of pure white. I chose the pure white to symbolically represent Jesus as the “Snow White Lamb of God”. I also imagine that Joseph and Mary may have splurged to make their first born a blanket of pure white linen. Mary would have lovingly woven it herself and added the brown trim to match her and Joseph. Baby Jesus has a little tuft of black hair and a barely noticeable little halo tucked safely into his swaddling clothes.
How to Paint A Mini Nativity:
If you’re a crafty creative person, chances are you won’t need my all inclusive guide to paint your own Mini Nativity Set. You can probably look at my photos and follow these simple steps to paint your own. If you find that you do need more guidance, paint colors, supply list, and detailed steps with photos, I’d recommend purchasing my GUIDE HERE.
BONUS: The PATTERN also includes a Tutorial for the little display base “stable” for Mary, Joseph, and Baby Jesus to sit in.
*you are welcome to use my designs as a blueprint for your own painting, however, if you choose to share your work on social media or sell your work using my designs, I ask that you give credit to me: Lindi Joe of Blythe House 1860
Please Note:
This set contains a small shape that is not suitable for children who mouth their toys, or pets. You can adapt this design to work with pretty much any shape or size of peg dolls you wish.
For collectors or older children, I find this set works best with the “small angel” shape for Mary and Joseph and the baby shape for Baby Jesus.
Paint Your Own
Hand painted heirloom toys are a labor of love, and while handmade toys are absolutely worth every penny, sometimes we just don’t have enough pennies! Now’s the time to break out the paint brushes and get crafty.
I truly believe that anyone can paint their own heirlooms but may be a little intimidated to start.
Let me help you start.
Step By Step
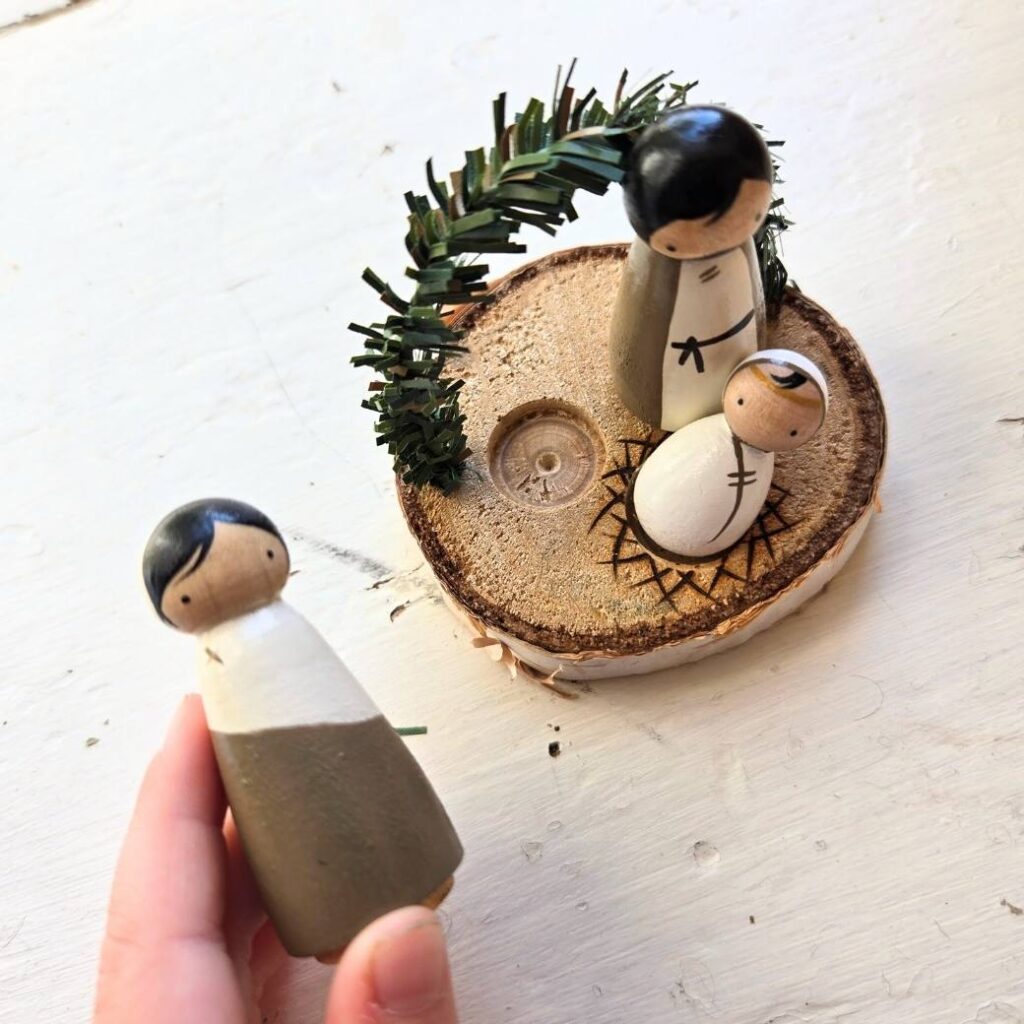
The Base Coats
- The first step is to decide on the skin tones of your peg dolls. I like to paint any skin tones first, before I add any hair or clothing, for a clean finish. Most of the time, I leave the natural wood as the “skin” since I think the woodgrain is so beautiful and there are so many variations in the colors of the wood itself.
- Paint two coats of white paint on Baby Jesus’ bottom. Let dry.
- Paint the front of Joseph’s robe that shows from under his cloak . Let dry.
- Paint Mary’s headscarf. Paint the hood on her head first, let dry. Then, paint the scarf around her shoulders. Let dry.
- Paint the rest of Baby Jesus’ body with two coats of the white paint. Let dry.
- Paint Joseph’s cloak. Let dry.
- Paint Mary’s dress. Let dry.
- Paint Baby Jesus’ hood with two coats of white. Let dry.
The Hair
- Paint Joseph’s hair and beard. Let dry.
- Paint Mary’s bangs. Let dry.
- Paint Baby Jesus’ little tuft of hair. Let dry.
The Details
- Paint the details on Baby Jesus’ swaddling clothes. Let dry.
- Paint the “X” detail on Mary’s shawl. Let dry.
- Paint the lacing detail on Joseph’s robe. Let dry.
- Paint Joseph’s belt. Let dry.
- Paint Baby Jesus’ little halo. Let dry.
- Last but not least, add a face. Eyes, nose, mouth, you decide. The simplest option is to add two black dots for eyes, (My favorite look) but you can experiment with what kind of face you like the best.
Seal
- When Mary, Joseph, and Baby Jesus are all completely dry, seal each peg doll twice (let dry between coats) with your favorite non toxic sealer.
For Beginners
I’m excited to offer for the first time, a pattern and guide for my popular Heirloom Mini Nativity Set. My affordably priced GUIDE PRINTABLE PDF is an attainable alternative to purchasing a hand painted set from me, or for those fellow creatives to prefer to paint their own, but want a professional finish.
This is so much more than a pattern. It is 24 pages of detailed instructions and photos. A step-by-step tutorial that even absolute beginners can follow. I’ve included a detailed list of supplies needed and lots of tips to make sure your peg dolls turn out professional looking.
If you’re looking for more peg doll sets to paint, check out my CHRISTMAS ANGELS PDF PATTERN HERE or the SPRING FAIRIES PEG DOLLS HERE
I hope that you enjoy painting your own Mini Nativity Set, and I’d love to see your finished pieces! Tag me over on Instagram @blythehouse1860 and I’ll share your work!
Happy Painting!


These are so cute, this would be a perfect project for my sister’s grandkids. Your house is beautiful, I could look at it all day!
Thanks so much!
These are adorable and such a great diy project!! Thank you for sharing! Definitely gets me excited for Christmas!
Thanks for reading!
You’ve got such great ideas for crafts and this one is my favorite! I love the simplicity of it and the minimalist approach. This Nativity group is beautiful! Thanks so much for sharing!
Thanks for taking the time to read. Appreciate it!
Such a cute diy project! This is a great way to get kids discussing the real reason for the season! Thanks for sharing!
Thanks so much, that was my heart behind this set.
These are so darling! What a wonderful Christmas craft activity!
Thank you!
What a great gift idea! And so fun to do with kids!
Thanks!